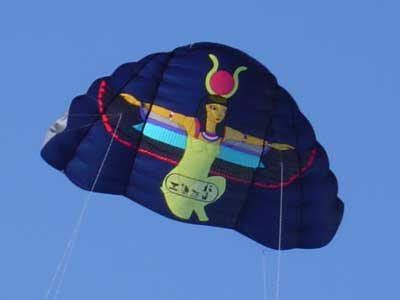
ISIS - Lady of the Sky
NASA Selection:
The large sail of a Nasa Parachute Wing is suitable for decorating it with different applied or painted images. As the technique for inserting the image was the "applique", the background color at the beginning was black but then it ended in a very dark blue sail.
Motif Choice:
While reading the best seller "da Vinci's Code" it called my attention the primitive worship to the goddess and, particularly, the associations made by the author between ISIS, the Egyptian deity, wife, mother, fertility cult, family cult, in relation with later Christian icons, the Sacred Family, the Virgin and the Child's image from the Renaissance, etc. When I afterwards looked in Internet the vast world of the Egyptian mythology, I discovered Winged ISIS images and started this project.
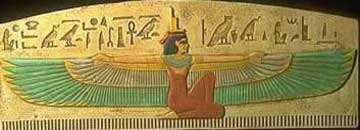
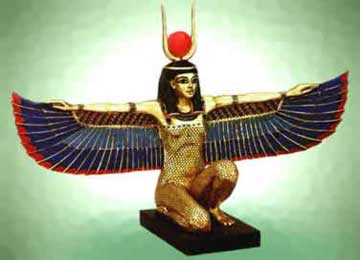
There are two types of images that could be useful for this work, that of the papyrus and mural paintings that represent the goddess in the typical profile images, so common in the Egyptian culture, or the representation of the same goddess as a statue, like that one at the Cairo Museum which we took for this development.
Building the Sail: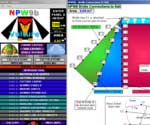 For designing the sail, it was used the program TW-NPW9B CALCULATOR.
The only variable data to enter into this program is the altitude, in this case, 180 cm. The program shows several working screens, fabric cut, sail plane once the seam is finished, bridle location and two alternatives for the bridles (turbo, which saves 30% of the threads, and the traditional). It also has a large number of screens with instructions and good quality details .
The sail material is coated taffeta, Azcuenaga St. and Lavalle St. at Once neighborhood in Buenos Aires, $4.50 per meter; for the cord that is inserted in every seam, I used flat braided nylon thread #1 from Moscuzza 433 M. de Hoz Ave., Mar del Plata Port, diameter: 1.7 mm and load: 105 Kg.
For bridles of 1.2 mm, compact Dacron was used ( $ 0.28/m - Alto Vuelo). I made traditional bridles, 120 m. in black color.
Working On The Image Chosen:
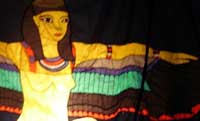
I draw the outline of a NASA-9, respecting proportions and enclosing the chosen image print of the Winged Isis from Cairo Museum.
When measuring the NASA-9 dimensions required for covering the whole design of the printed Isis, it appeared that there was a relationship 8.33 times smaller than the sail design.
I made a quadrille of a 1 cm side on this Isis-NASA image and draw it by hand on some sheets of paper previously squared at 8.33 cm by side. That is to say, I made the drawing 8.33 times bigger. I used continuous computer paper stuck with tape, a big sheet of paper for the body (without the sun crown nor horns), and another big sheet of paper for one wing, the other one is symmetric. The drawing takes several hours.
Technique for Assembling the Image - Materials:
For assembling the image, I just used Ripstop trimmings that Alto Vuelo kindly gave me, and which were distributed in an orderly slapping during two BATOCO's Sunday meetings at Costa Escombro.
Working on a glass table with a light underneath, you can trace each piece from the plane, leaving 1 cm around for the seam. In some colors it was not respected the original design, due to the personal creativity and the colors available in the Ripstop trimmings.
I started assembling the face, hair, arms. Then the torso, the body. Then, for the wing, apart from Ripstop I used a 5 mm golden tape to stamp the feathers. The other wing is made similarly, though using the reverse side of the plane, always drawing on the glass table with the light underneath. The headdress was the last thing to draw and assemble, with the sun y the ox horns.
 To join the parts, first I engraved them with a welder and then sew them with a double straight seam, using the machine (the old Singer from grand-grandmother).
The assembling of the parts (body, wings and headdress) was done similarly, engraving with a welder and a double straight seam, in this case on the kitchen floor tile, partly for size-reasons and chiefly, to align the wings.
For the seams, it was used thread in the color that corresponded to the piece at the top or to the darker one (thousands of needle thread each time the thread was changed). Cadena thread for jeans, strong Gutermann and Corrente Pespunto, at the neighboring notions store.
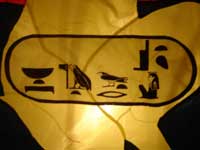 A special note regarding the hieroglyphic that adorns the sail: After investigating the subject in Internet, I found this prayer that appears in an Egyptian temple, Isis, Grand Lady, God's Mother, Lady of Sky.
In this case, it is read from the right to the left, because beings look in that direction; it can be written vertical or from the left to the right, following architectonic conveniences.
It is painted with permanent marker on white Ripstop and sewed on an area of the figure that was not well solved in its design.
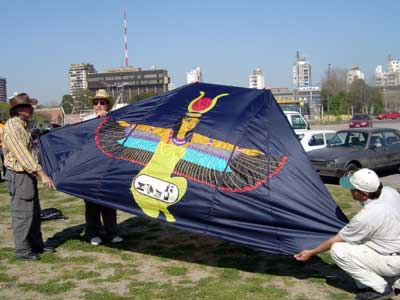
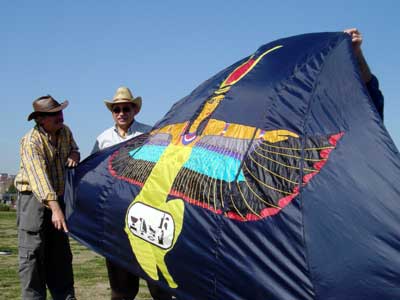
Mounting the Figure on the NASA-9 Sail:
Finally, the figure, completely assembled, was mounted on the coated taffeta sail, on the reverse of the sail and the figure reverse (applique technique).
The figure, engraved with the welder, was again placed on the tile floor, considering its size, and a double seam was applied along the figure periphery with 1 cm exceeding the whole rim.
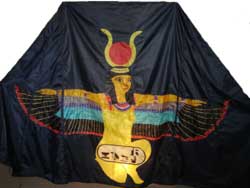 Finally, the taffeta was entirely retired from inside the surface of the Winged Isis figure, exhibiting the upright figure. For this purpose, it is sown at the back of the sail and of the figure.
The task of retiring the taffeta is key in the applique technique, and it must be done with much calmness and precision.
The central parts are removed with a big pair of scissors, and then, with the small, sharp-edged pair of scissors it is retired the material, a few millimeters from the seam.
You must be careful of not entangling and cutting the figure with the pair of scissors, just retire the taffeta that covers the design.
Finishing the Kite:
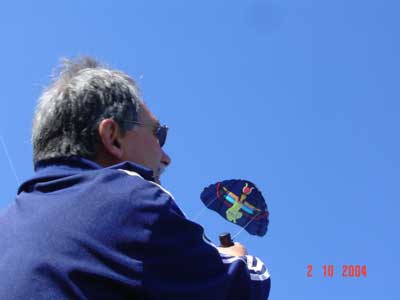
After taking some photos, the sail is finished by making the nose tucks and sticking narrow strips to keep the nose in shape.
As it was chosen the traditional bridle system, the 24 pairs should be prepared cutting and labeling in pairs, leaving in one end a knot sealed with fire by using a lighter, and in the other, "sharpening" the bridle. With the lighter, you barely burn the Dacron and then let the bridle run between your fingers -suitably wearing gloves or else, wrap them in an old rag-; thus, the bridle is sealed (the braid wouldn't take apart), not with the typical burnt end, but stretched in such a way that it allows threading.
A tufting needle helps to fasten each bridle in its place. These needles have quite a sharp end that allows to hook the bridle behind the cord that is inside the seam, and they have an eye of needle big enough to allow threading each Dacron bridle, suitably prepared as explained above. It is always used a slipknot.
Now, what's left is part of a NASA assembling, which is very well explained in the computer program mentioned.